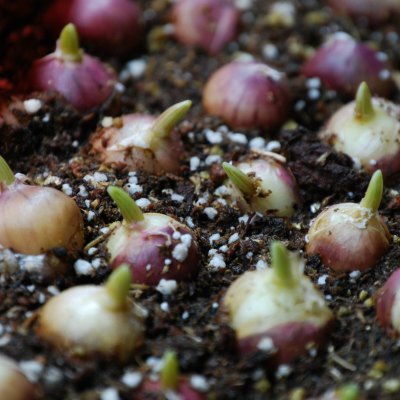
In Quebec, garlic (Allium sativum) is a perennial plant that is grown as an annual.
The multiplication of garlic is often done by cloves. But you can also propagate garlic using the bulbils that are produced in the flower capsule.
Bulbils are said to be the seeds of garlic, but this is not the case. The bulbils are in fact clones of the bulb, therefore genetically identical, because the flowers are sterile and therefore do not produce seeds (except on rare occasions, in certain varieties).
There is therefore no fertilization, so it is important to note that the varieties do not mix and that a variety can be planted directly next to another without fear of crossing and without any isolation precautions.
The size and color of the bulbils vary between horticultural groups. The ''Rocambole'' produce purple bulbils the size of a large pea while the ''Porcelain'' produce small pink bulbils the size of a grain of rice.
How to plant bulbils
Growing garlic from the bulbil takes longer than growing it from cloves. The advantage is the much lower price for a large quantity of bulbils. It will take a bulbil two years, sometimes three, to achieve a bulb of good size.
The planting of the bulbils can be done in the fall or in the spring.
First year of growth:
Step 1
If you planted your bulbils the previous fall: In the spring, the bulbils will produce small plants with 3 or 4 leaves. You weed them, and you let them grow. They will form a ROUND during the summer. If you planted tightly, you will need to thin them out. Proceed to STEP 3.
2nd step
If you plant your bulbils in the spring: From mid-April to the end of April, you sprinkle your bulbils in small styrofoam-type boxes or mushroom boxes (perforated). Do not worry about the top or bottom of the bulbils, they can end up lying down, this is ideal. Cover them with 0.5 cm (3/16 inch) of soil. Mulch.
Thin shoots that look like grass will then come out of your boxes. When all risk of frost has passed (end of May for Montreal), you will transplant your bulbils in rows directly outside. Make sure the stem is at least 3 cm deep (1-1/8 inches) and the roots are well covered. You can plant close together, 7 or 10 cm apart (3 1/2 inches). Mulch. Proceed to STEP 3
Step 3
During the summer: In mid-August, when the foliage has turned yellow, dig up the rounds and keep them in a dry place. Around mid-October, plant the rounds 7 to 10 cm (3 1/2 inches) apart, at the same time you would normally plant pebbles. Mulch.
WHERE
If the foliage does not turn yellow, simply leave them in place but make sure to have a distance of 5 to 10 cm between them. Mulch.
Step 4
Winter is here, the bulbils have become circles and are dormant. Nothing to do.
Second year of growth:
Step 5
Rounds planted last fall will come out of the ground and have 7 to 8 leaves, a delicate flower stalk that you must cut if you want a bigger bulb. Otherwise, the flower will form bulblets. Underground, the circle will divide during the season into 5 to 8 pebbles, depending on the variety. In July, when the first leaves turn yellow, you can pick your garlic!
It should be noted that the bulbils are eaten, as well as all parts of the garlic except the roots.
You can get bulbils on our website at www.terrepromise.ca or come see us at the Montreal Botanical Garden Garlic Festival, every year in September.
How to produce bulbils?
You can harvest your garlic, but on the other hand, you can let part of your harvest complete its natural cycle. When the flower stalk appears, do not cut it and let the flowers become bulblets.
At the end of August, when the bulbils begin to dry, cut the flower stem and let the bulbils dry without separating them from the stem. After two or three weeks, you can detach the bulbils. Don't forget to properly identify your varieties. You can store them in mesh bags or paper bags, like an onion.
We would like to thank Sylvie Maurice, from Samour’Ail, for the valuable advice that fueled this post.
